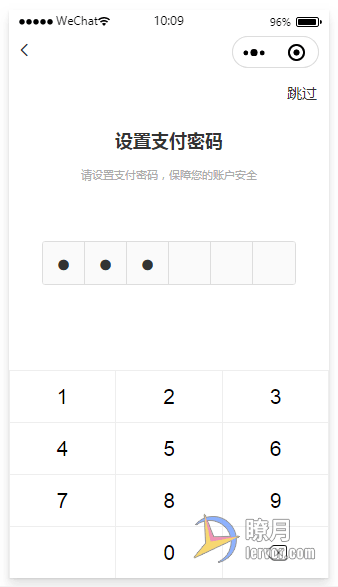
我们在用 uni-app 开发前端页面时,经常会涉及到支付,为了资金安全,往往就需要设计支付密码功能。为了方便,我们 基于 colorui 开发一个类似下图的简单页面。
具体代码如下,供大家参考:
HTML 代码:
<template>
    <view class="password-set-page">
        <cu-custom is-back></cu-custom>
        <view class="margin text-xl text-right">
            <text>跳过</text>
        </view>
        <view class="text-xxl text-center text-bold margin-top-xl">设置支付密码</view>
        <view class="text-df text-center text-gray margin-tb">请设置支付密码,保障您的账户安全</view>
        <view class="code flex align-center justify-center" style="margin-top: 10vh;">
            <view class="flex align-center justify-center">
                <view v-for="(item, index) in 6" :key="index">{{ password[index] && '●' || '' }}</view>
            </view>
        </view>
        <view class="keyboard flex flex-wrap">
            <button v-for="(item, index) in 9" :key="index" @click="key(index + 1)">
                <text>{{ index + 1 }}</text>
            </button>
            <button class="hide"></button>
            <button @click="key(0)">
                <text>0</text>
            </button>
            <button @click="del()">
                <image src="/static/images/icon/icon-keyboard-delete.png" mode="aspectFill"></image>
            </button>
        </view>
    </view>
</template>
JS 代码:
<script>
    export default {
        data() {
            return {
                password: ''
            }
        },
        methods: {
            key(key) {
                if (this.password.length < 6) {
                    this.password += key
                    if (this.password.length === 6) {
                        // 密码验证操作
                    }
                }
            },
            del() {
                if (this.password.length > 0) {
                    this.password = this.password.substring(0, this.password.length - 1)
                }
            }
        }
    }
</script>
SCSS 代码:
<style lang="scss">
    page {
        background: #FFFFFF;
    }
    .password-set-page {
        .code {
            >view {
                border: 1px solid #DDDDDD;
                border-radius: 8rpx;
                overflow: hidden;
                view {
                    display: flex;
                    align-items: center;
                    justify-content: center;
                    width: 100rpx;
                    height: 100rpx;
                    background: #FAFAFA;
                    font-size: 60rpx;
                    &:not(:last-child) {
                        border-right: 1px solid #DDDDDD;
                    }
                }
            }
        }
        .keyboard {
            position: fixed;
            bottom: 0;
            width: 100%;
            background: #EEEEEE;
            button {
                display: flex;
                align-items: center;
                justify-content: center;
                width: calc(100vw / 3 - 1px);
                background: #FFFFFF;
                border-radius: 0;
                margin-top: 1px;
                font-size: 50rpx;
                height: 120rpx;
                &.button-hover:not(.hide) {
                    background: #EEEEEE;
                }
                image {
                    width: 52rpx;
                    height: 38rpx;
                }
            }
        }
    }
</style>
大家也可以将该页面进行组件化来重复利用。
版权属于:瞭月
本文链接:https://www.lervor.com/archives/207/
版权声明:本文为瞭月原创文章,转载请附上原文出处链接和本声明。